Click or tap any of the small images to see them in full size.

1. Obtain the G7towin Executable
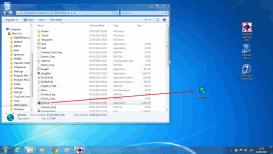
You will need the G7towin executable. It is normally included with the SeaClear installation (usually in Folder 1 ). If you cannot locate it, you can download it from the usual source.
Save the G7towin executable to your desktop.
2. Export Your Route from SeaClear
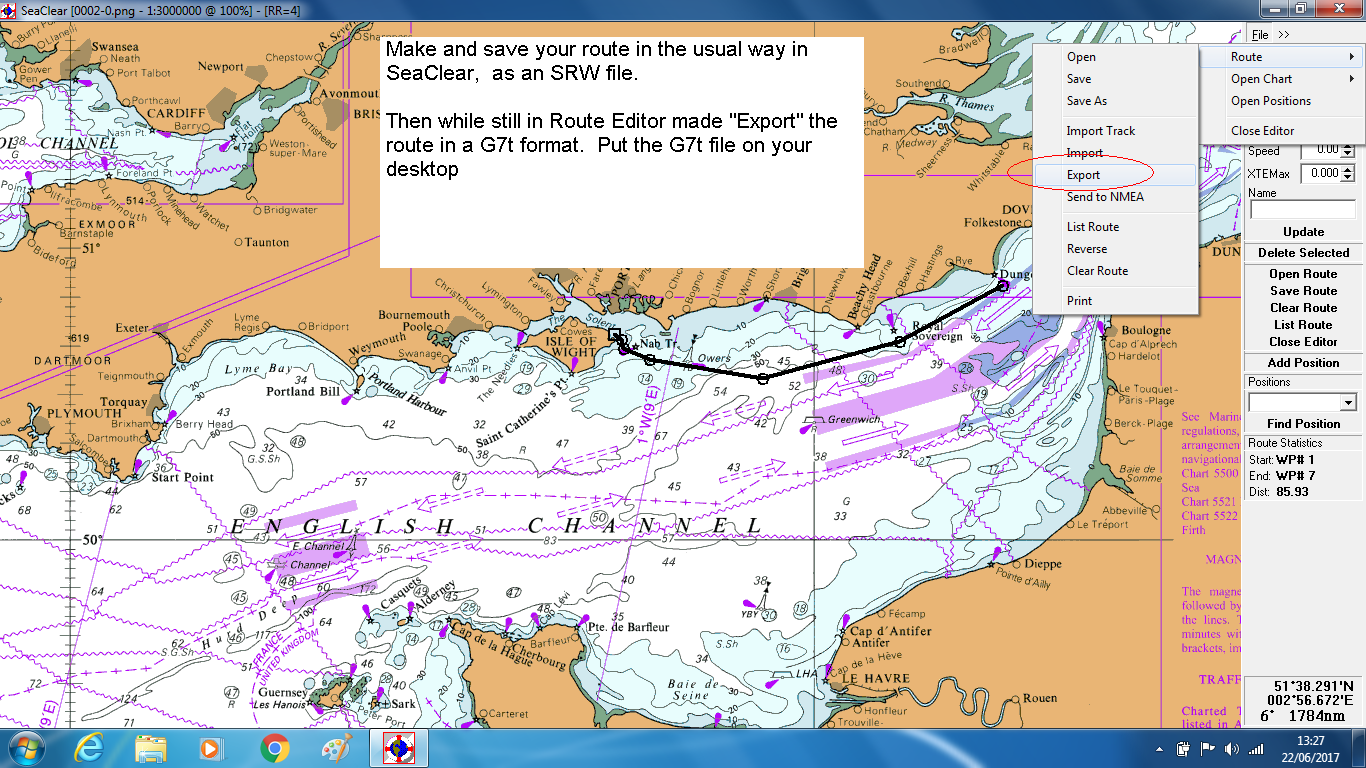
Open SeaClear.
Display the route you want to convert, and switch to Route Editor mode.
Go to File → Export.
Save the route as a G7T file on your desktop.
Close SeaClear once the file has been saved.
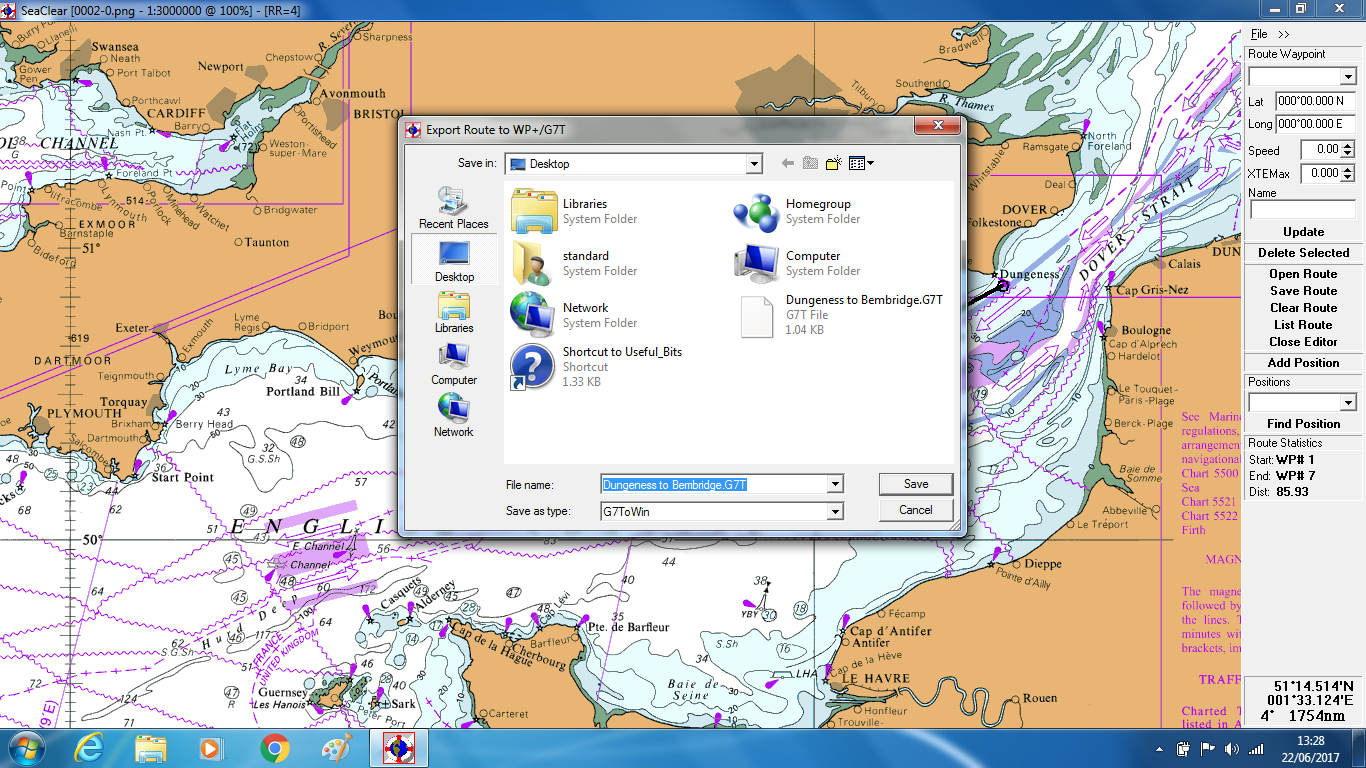
Save route as a G7T file on your desktop
Close SeaClear, see the route you have saved as a G7T file
3. Convert the G7T File to GPX
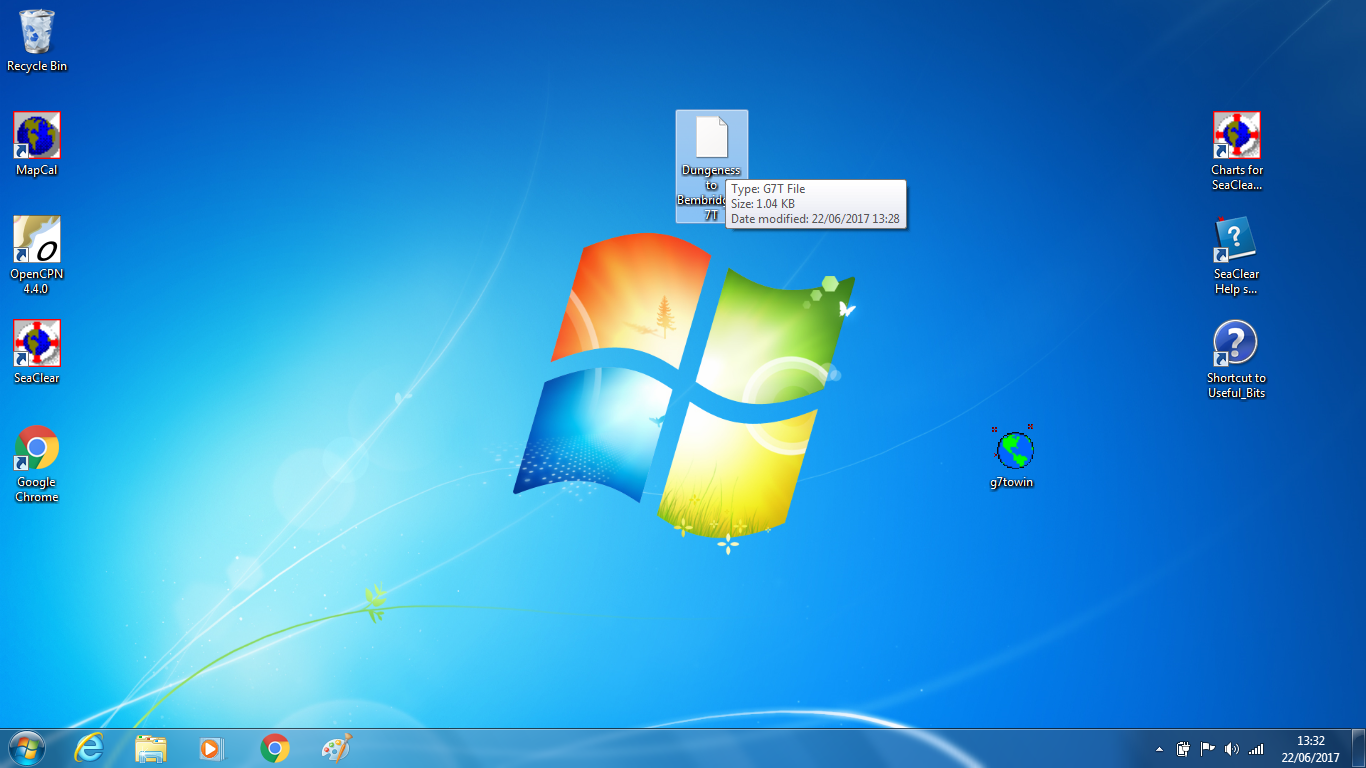
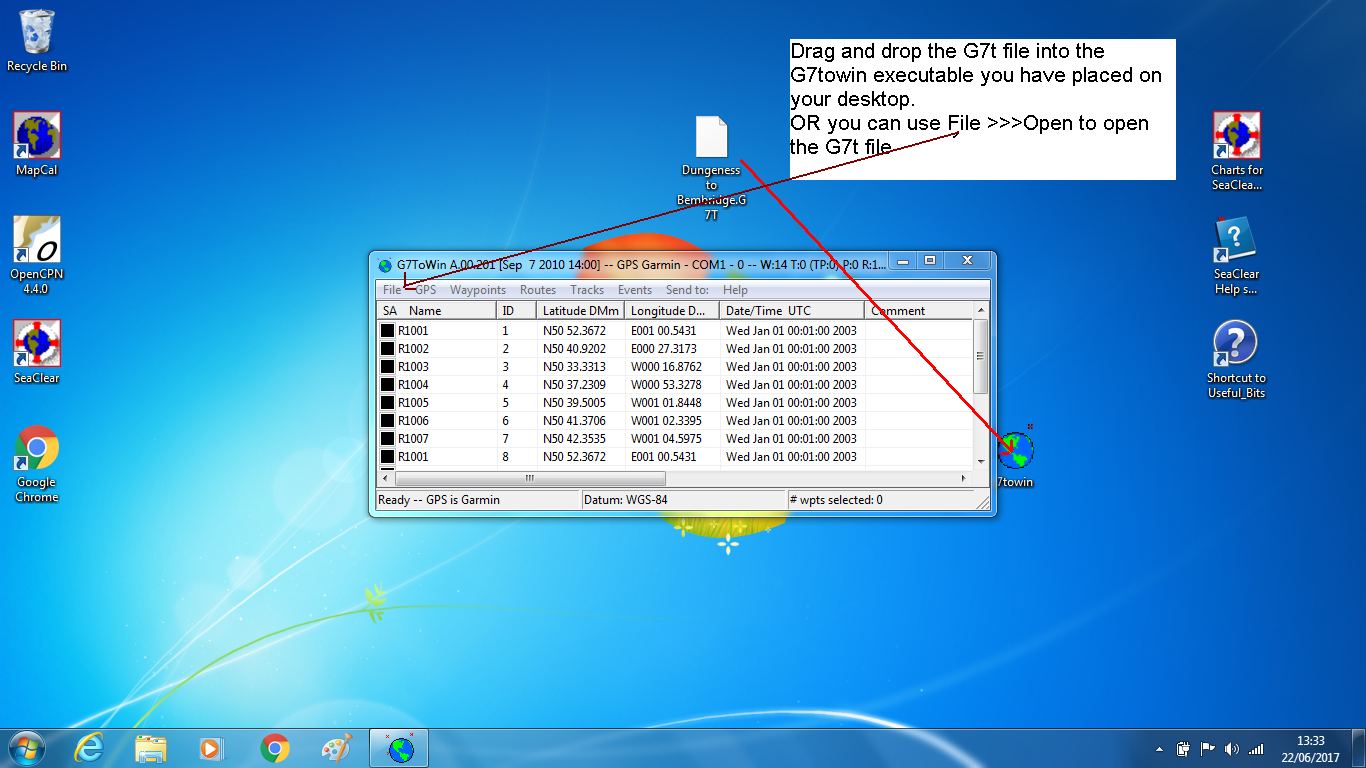
Locate the G7T file you saved on your desktop.
You can open it in G7towin in either of two ways:
Drag and drop the G7T file directly onto the G7towin executable, or
Open G7towin and use File → Open to select the file.
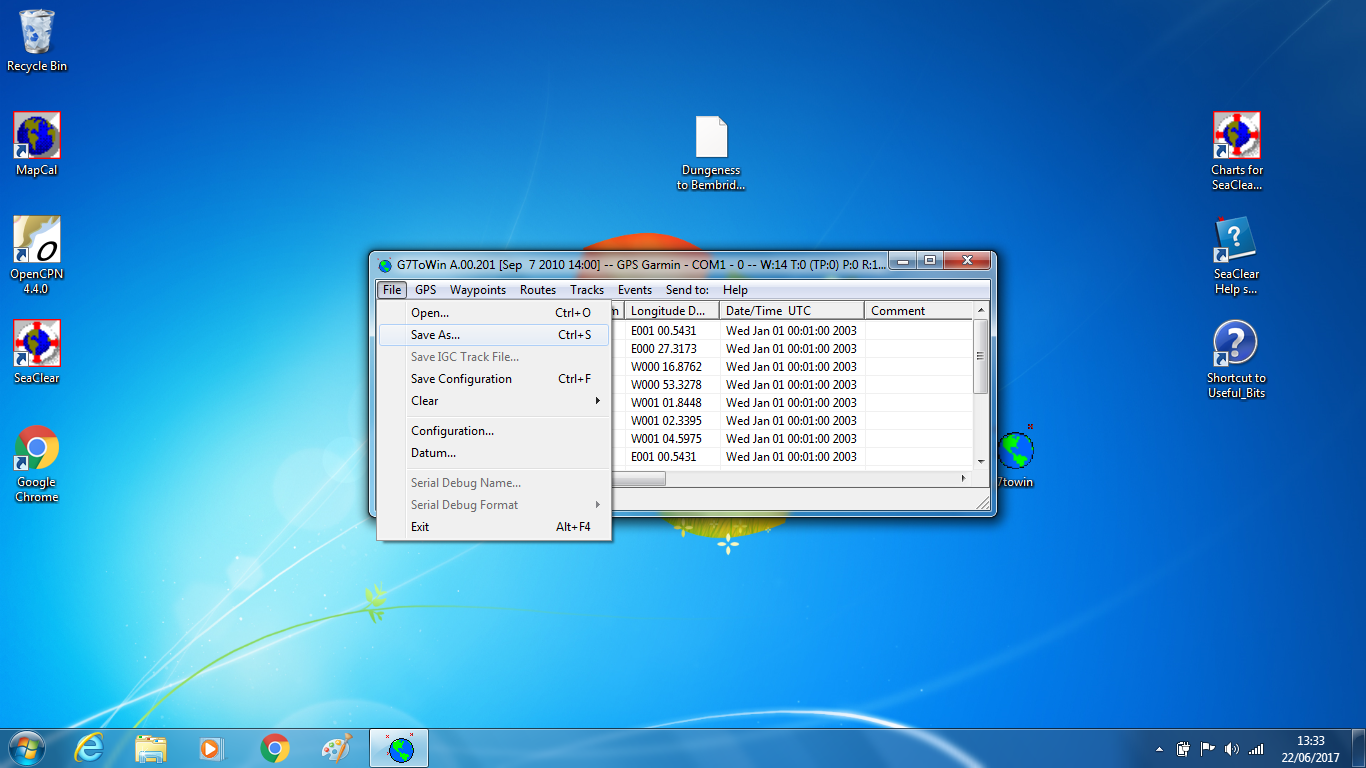
Once the route is open in G7towin:
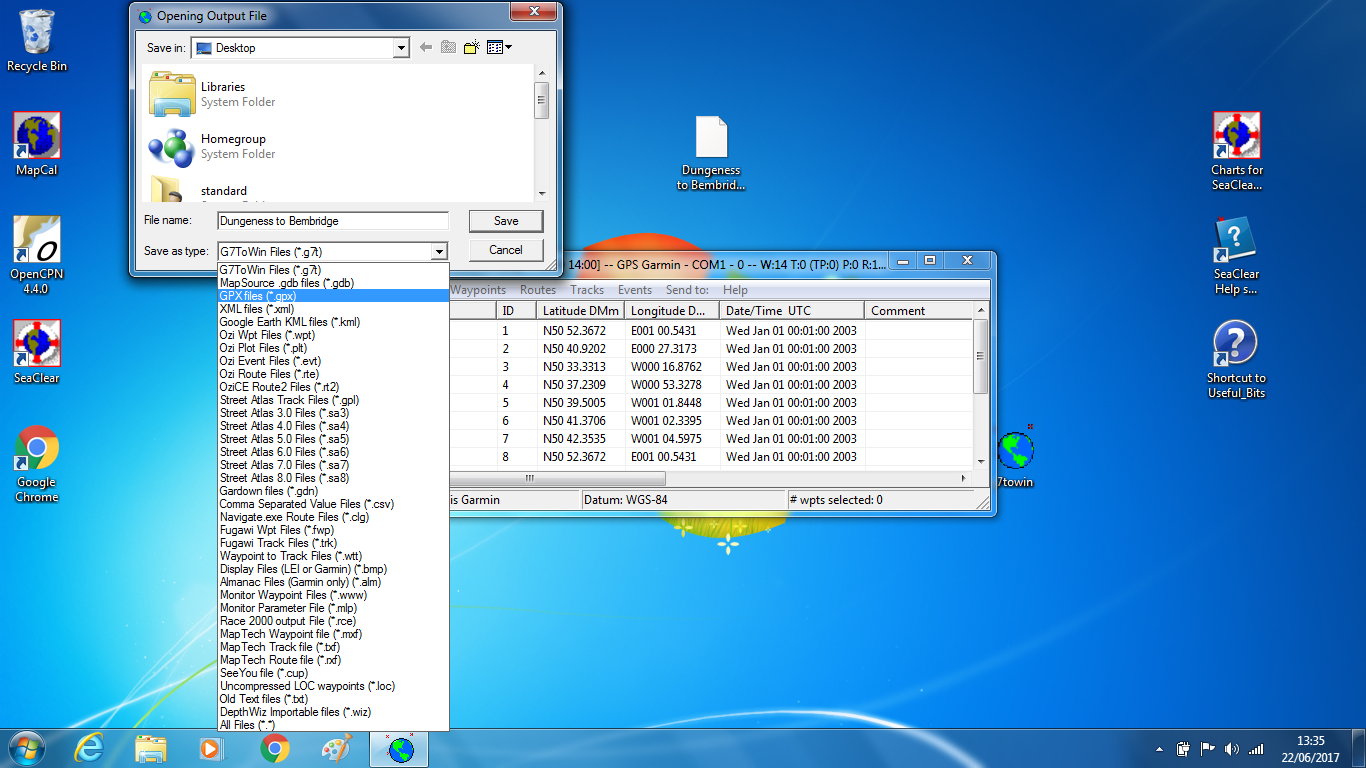
Go to File → Save As.
Save the route in GPX format.
You now have a GPX version of your SeaClear route on your desktop.
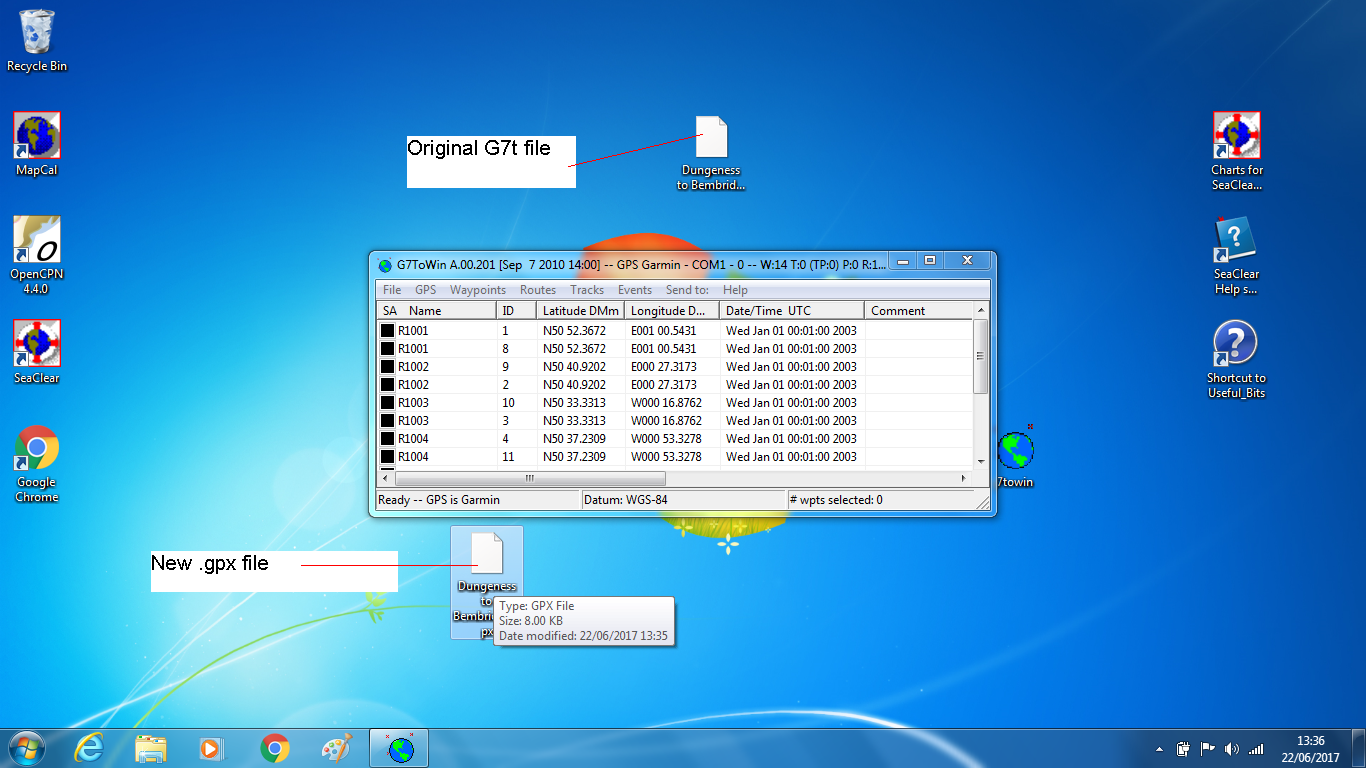
You now have a GPX file of your SeaClear route on your desktop.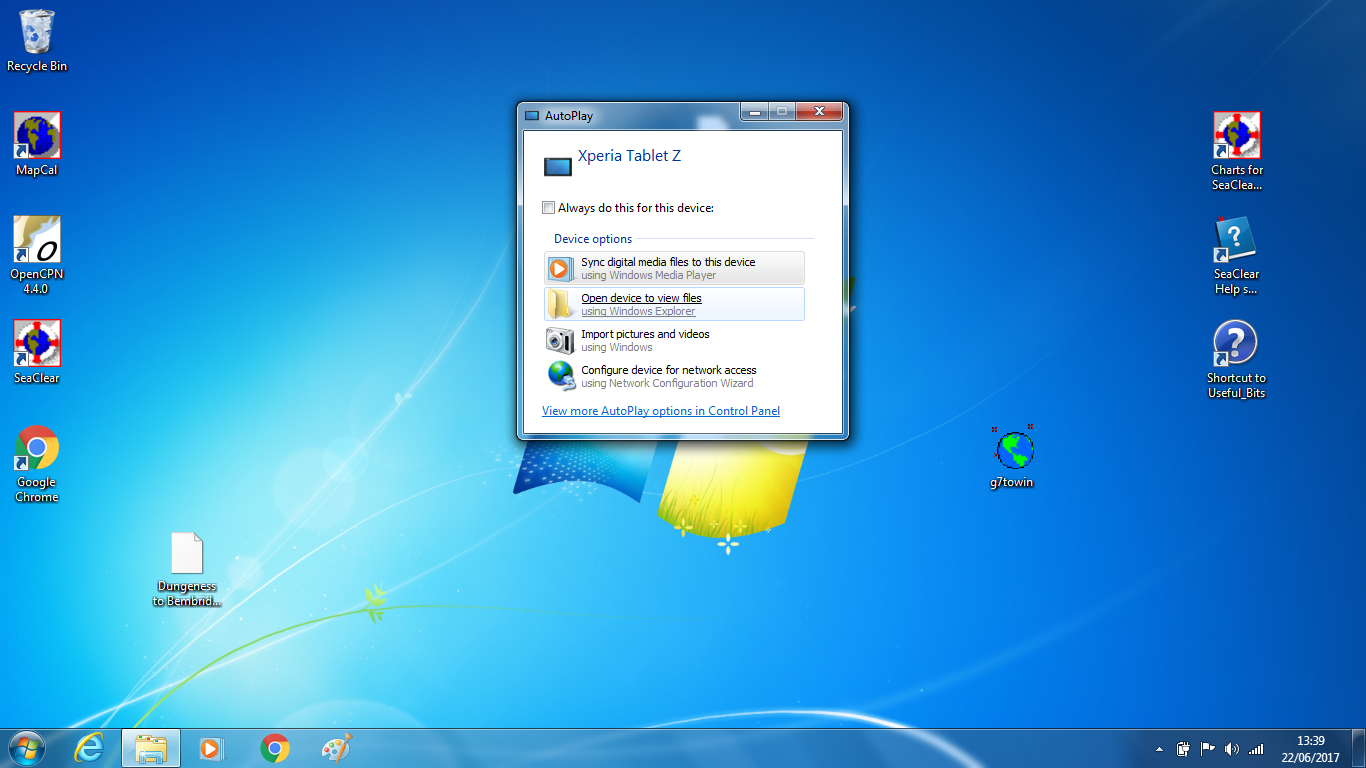
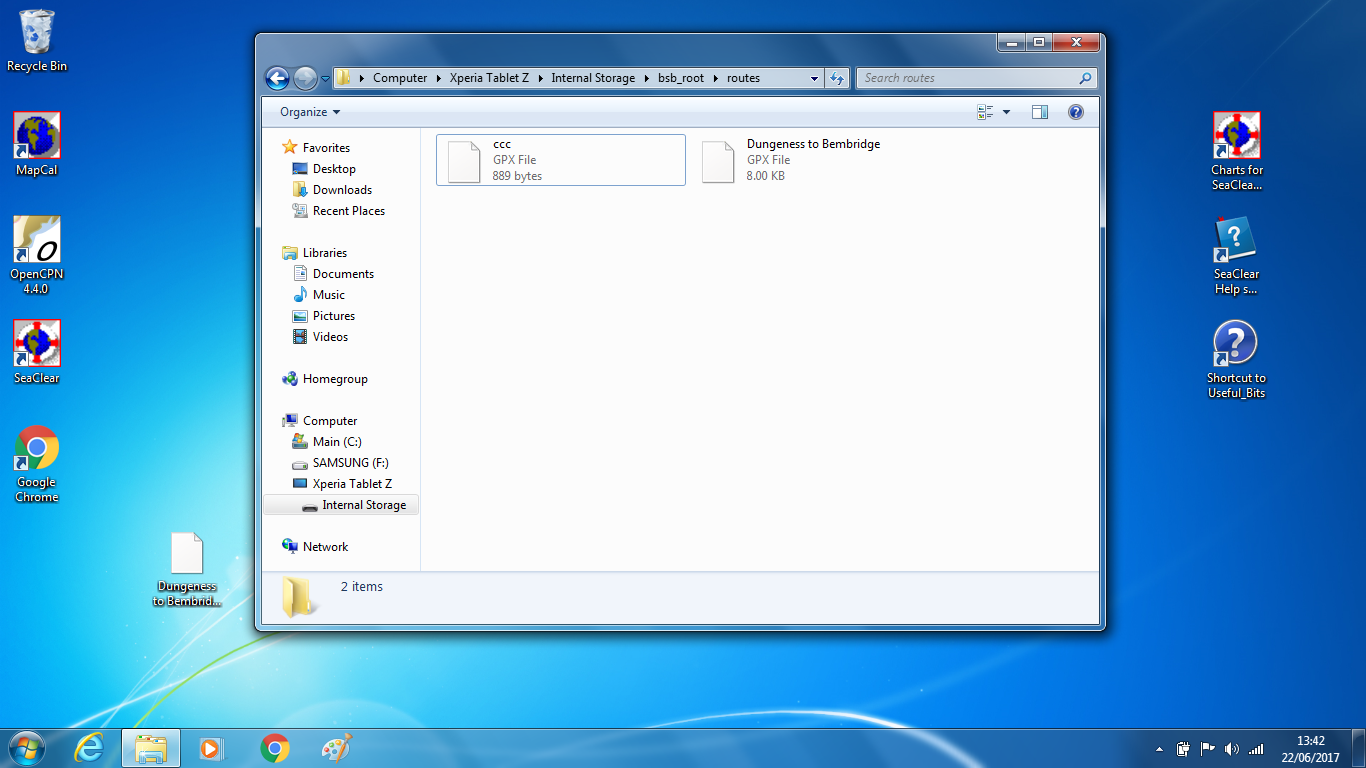
4. Transfer the GPX File to Your Android Tablet
Connect your Android tablet to your computer using a USB cable.
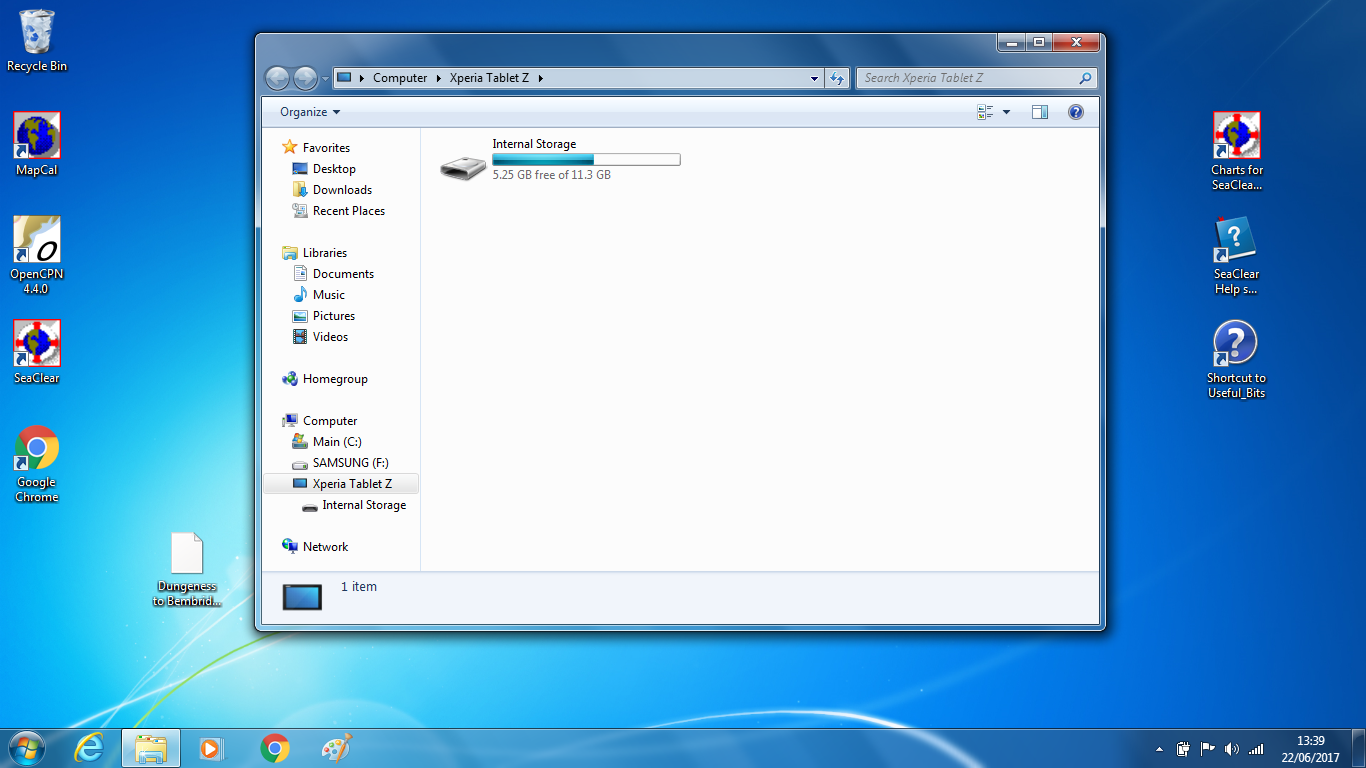
Open the tablet’s storage in Windows Explorer.
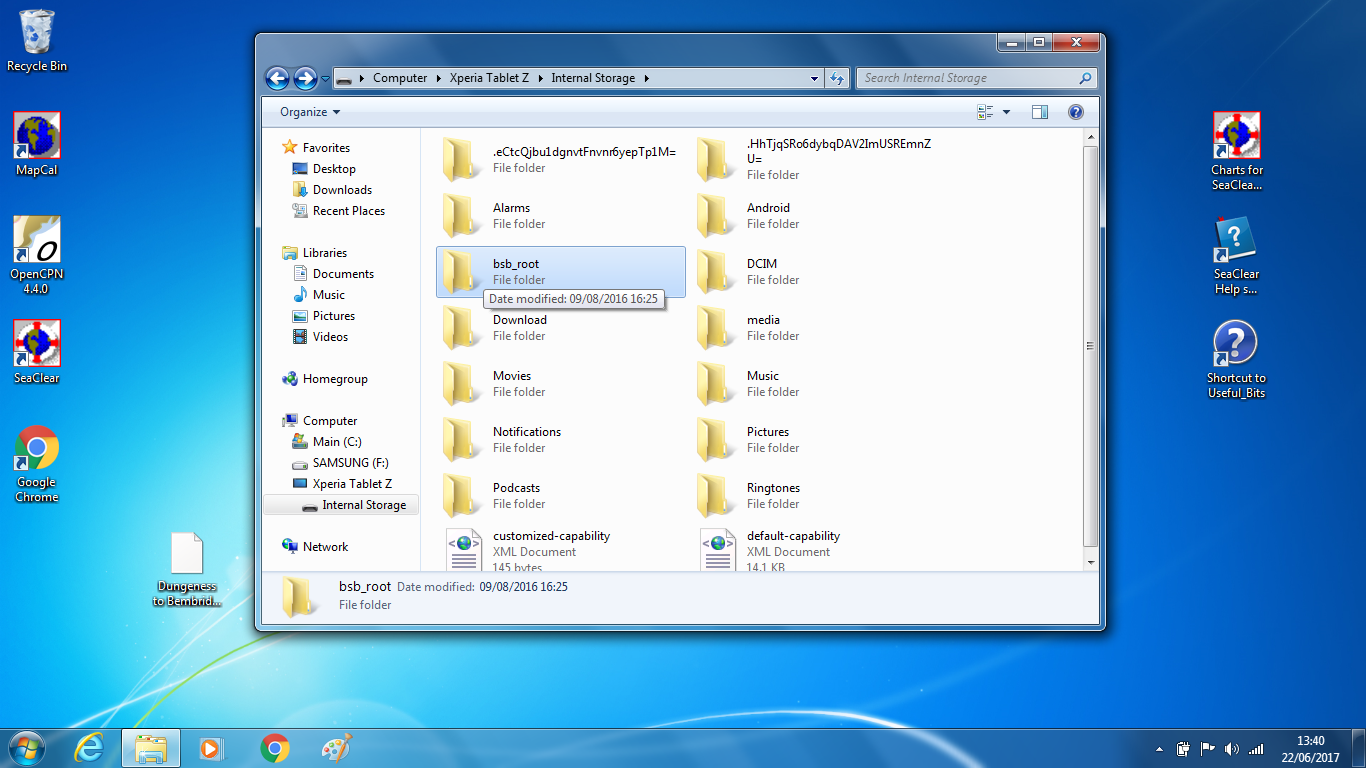
Locate the folder named BSB_ROOT.
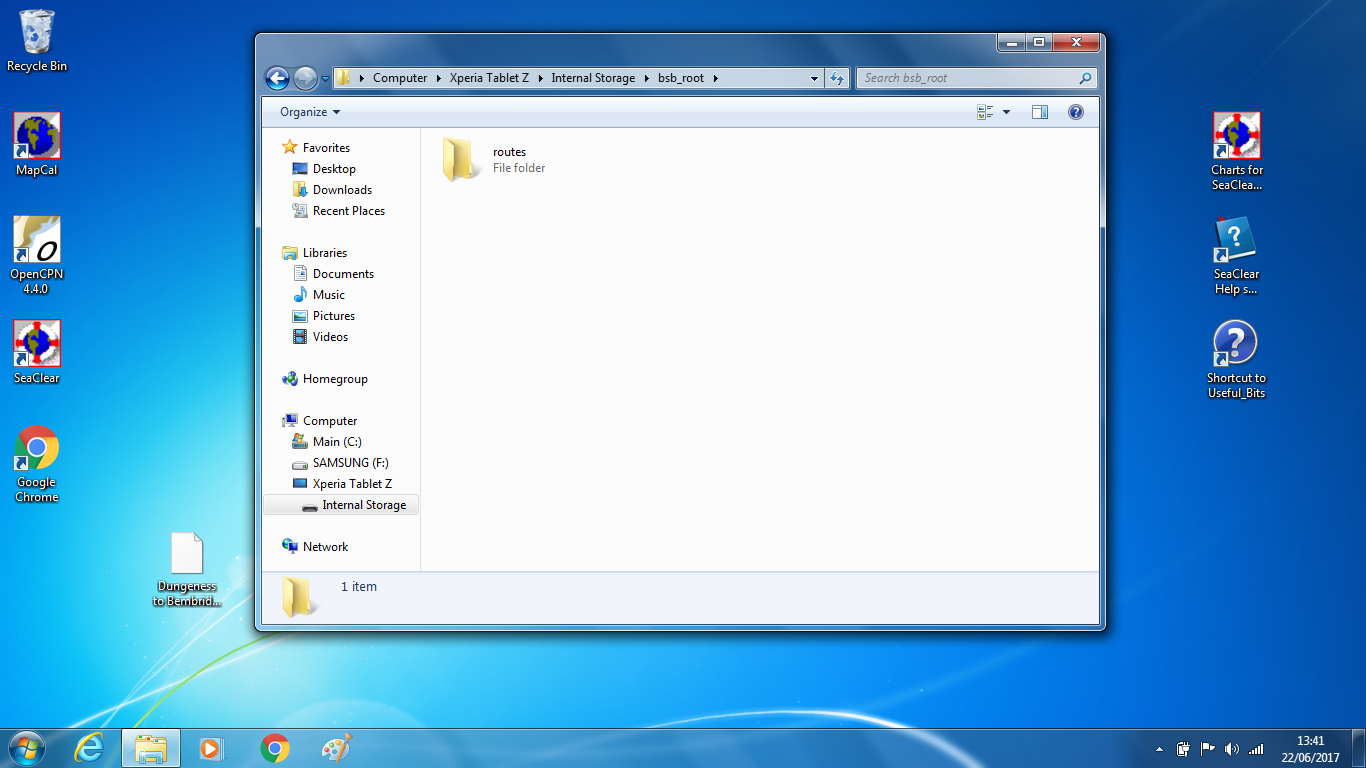
Inside BSB_ROOT, open the Routes folder.
Drag and drop your GPX file into this Routes folder.
Once the file has transferred, disconnect the tablet.
5. Open the route in Marine Navigator
Launch Marine Navigator on your Android tablet.
Tap the three horizontal bars (menu).
Select Routes → Open.
Choose the GPX route you just copied.
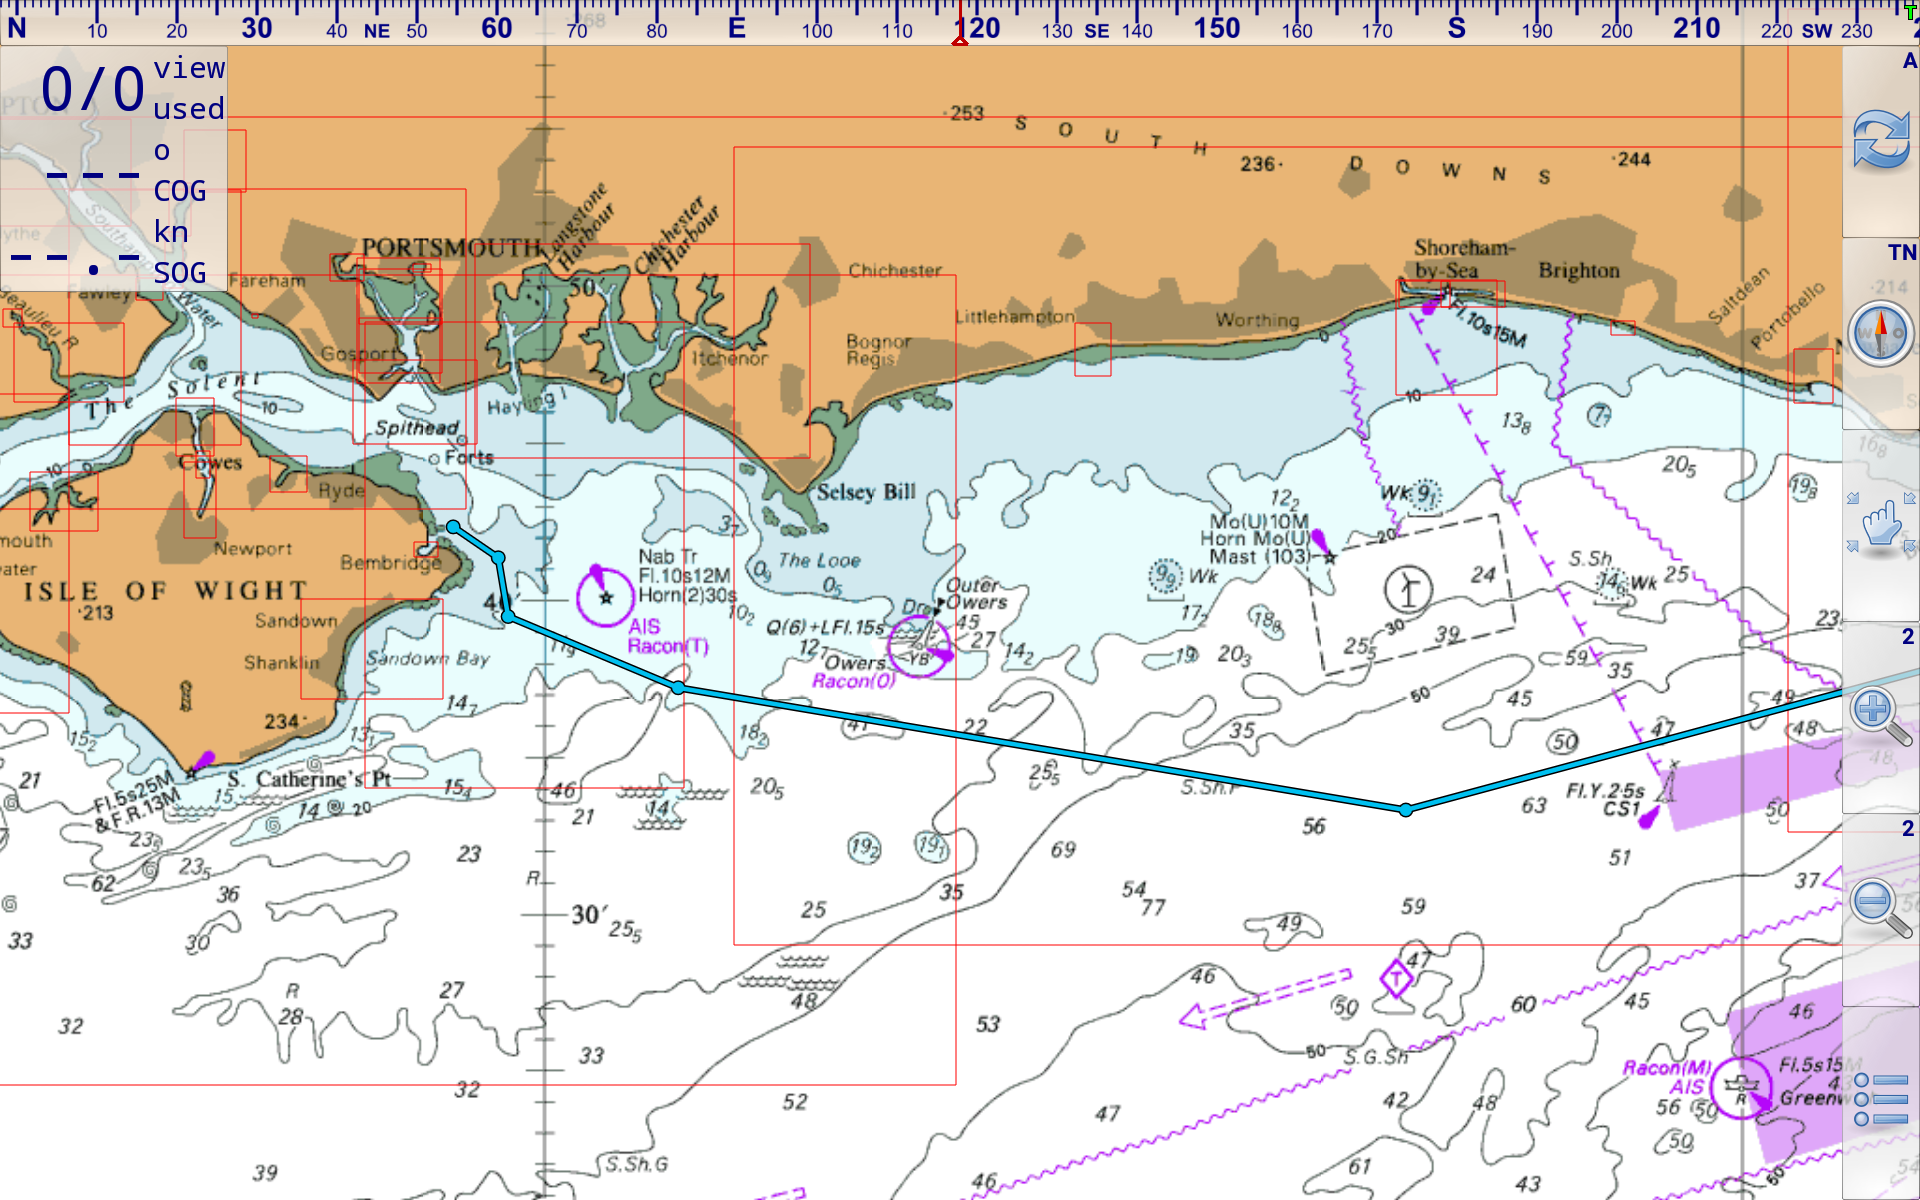
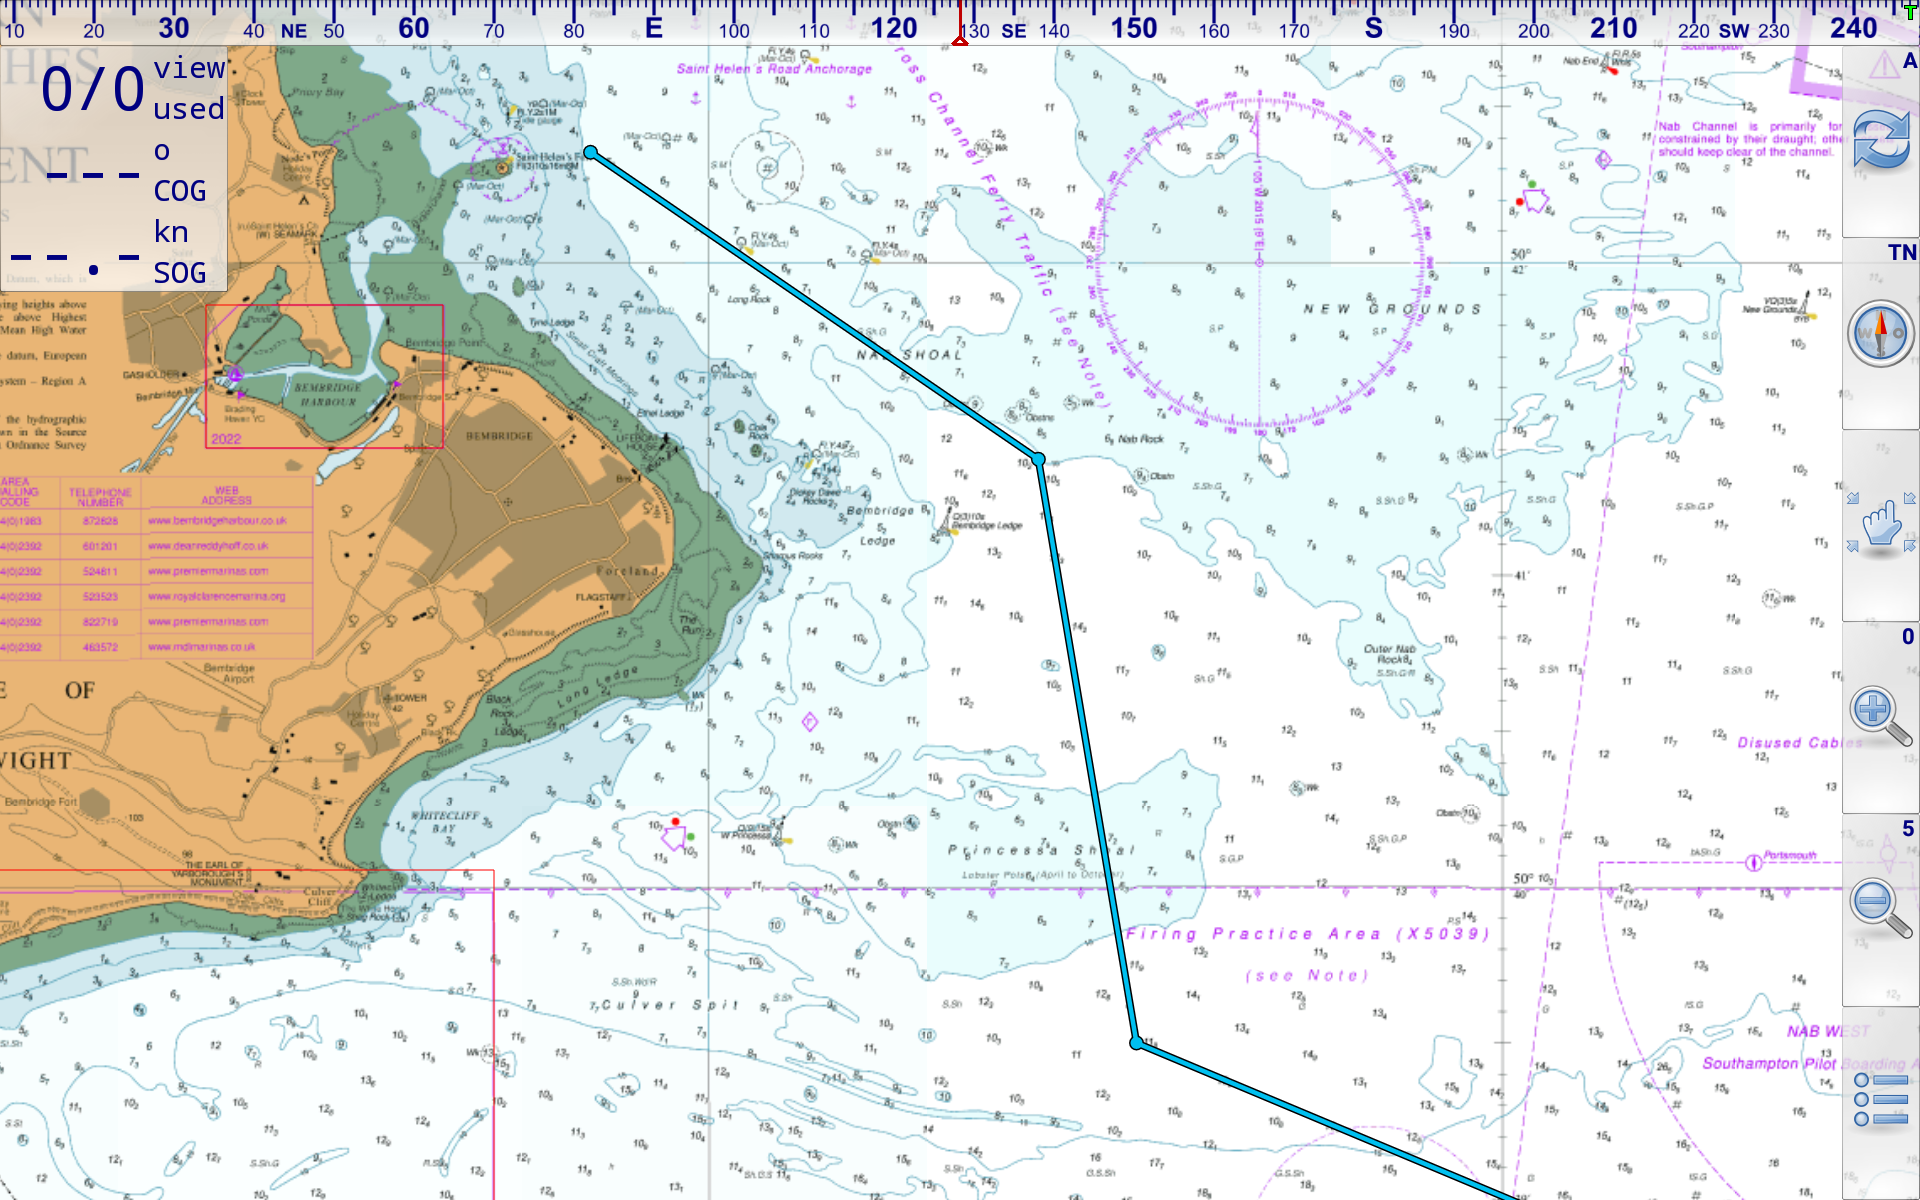
Your route will now appear in full detail, ready for use at sea within Marine Navigator.
This article was first published on 22 June 2017.